Wall Yoga Poses for Beginners: 8 Poses and a 15-Minute Sequence
Wall Pilates had its big moment, and fair enough. But wall yoga has been around much longer, and honestly, the wall is one of the best props you already own. Here are 8 beginner poses, a 15-minute sequence and the mistakes I see most often.
Why Wall Yoga Works
A wall does a few jobs at once. It doesn’t move, it doesn’t judge, and it’s free.
- Balance support. One hand on the wall and tree pose stops being a wobble contest. You work on the shape instead of trying not to fall over.
- Alignment feedback. The wall kinda shows you where you are. Back flat against it in chair pose means a long spine. A foot sliding down it means something shifted.
- A safer way into inversions. Getting your hips over your head is scary at first. The wall gives you a fixed point and a quick way out.
- Restorative holds. Legs up the wall is the classic. You stop working and let gravity do the rest.
To be clear, a wall won’t fix a bad back on its own. It makes poses easier to learn and repeat, and repeating them is what changes things.
If you have a heart condition, high blood pressure, glaucoma, a recent injury or you’re pregnant, check with your doctor before doing inversions or long holds.
What You Need
Not much.
- A clear stretch of wall. No shelves or picture frames at head height. A closed door works if nobody will open it mid-pose.
- A yoga mat. Put the short end against the wall so your feet and hands don’t slide.
- A folded blanket or a cushion. Useful under your hips in legs up the wall and under your knees for anything kneeling.
- Optional props. A block or two helps in warrior III and figure four.
Socks are a no. Bare feet grip the mat and the wall much better.
8 Wall Yoga Poses for Beginners
These go roughly from easiest to hardest. Leave the handstand prep for a day when you’re warm and steady.
1. Legs Up the Wall
The one everyone loves. It asks almost nothing of you.
- Sit sideways with one hip touching the wall.
- Lie back and swing both legs up the wall as you turn. Your sitting bones end up close to the wall, your back on the mat.
- Wiggle closer or farther away until your hamstrings feel comfortable. Closer is not better if it makes your lower back lift.
- Let your arms rest by your sides, palms up. Stay for 3 to 5 minutes.
A folded blanket under your hips gives a gentle lift. To come out, bend your knees, roll to one side and pause before you sit up.
2. Wall Downward Dog
A good way to learn the shape of down dog without carrying all your weight in your wrists.
- Stand facing the wall, about an arm’s length away.
- Place your palms on the wall at shoulder height, shoulder-width apart.
- Walk your feet back and fold from your hips until your arms and back form one long line, roughly parallel to the floor.
- Press your hands into the wall and reach your hips back. Keep a soft bend in your knees if your hamstrings are tight.
- Let your head hang between your arms. Hold for 5 to 8 breaths.
3. Wall Chair Pose
Basically a wall sit with yoga arms. Your thighs will notice.
- Stand with your back against the wall and walk your feet about a foot forward, hip-width apart.
- Slide down until your knees are bent. Start with a small bend. You don’t need to reach a 90 degree angle on day one.
- Check that your knees sit over your ankles, not past your toes.
- Press your lower back gently toward the wall and raise your arms overhead, or keep your hands on your thighs.
- Hold for 5 breaths, then slide up. Rest and repeat once or twice.
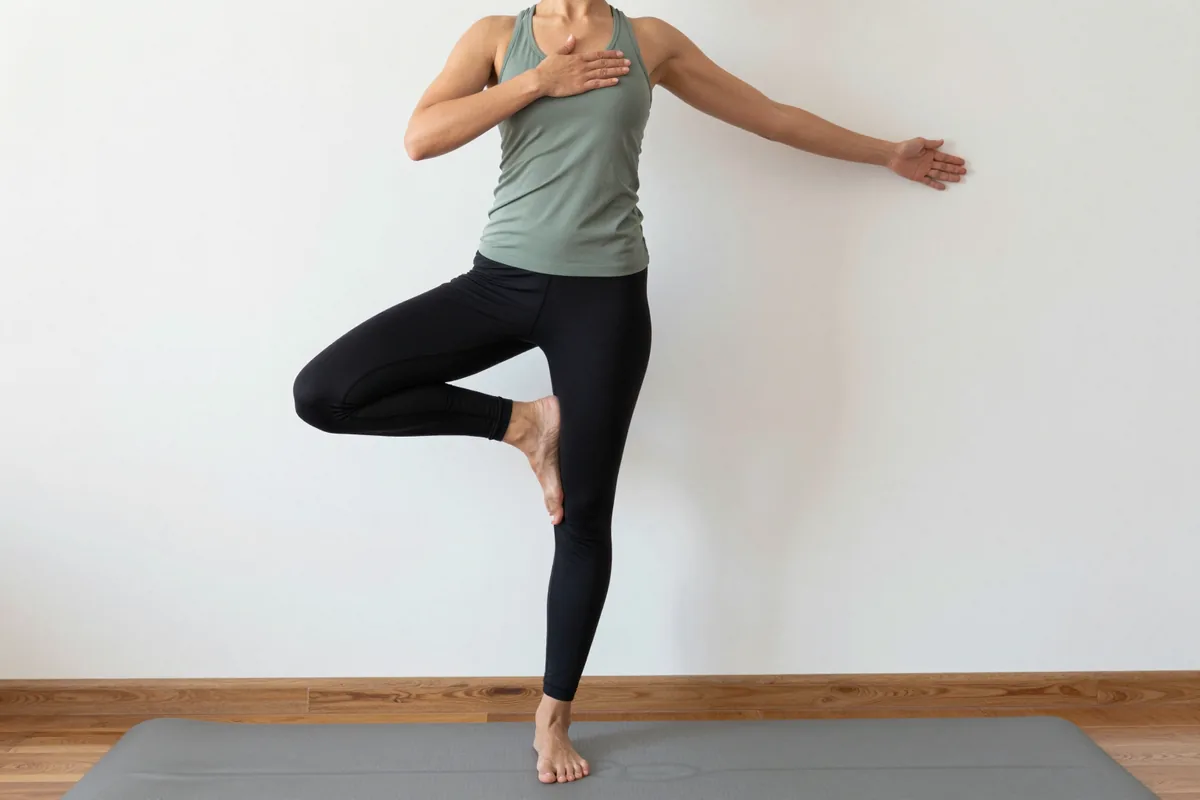
4. Wall Tree Pose
Tree pose with a backup plan.
- Stand side-on to the wall with your right side close enough to touch it.
- Rest your right fingertips on the wall at shoulder height.
- Shift your weight into your right foot and place your left foot on your inner ankle, calf or inner thigh. Never on the knee itself.
- Press your foot and leg into each other. Lengthen up through the crown of your head.
- Once you’re steady, try lifting your fingertips off the wall for a breath or two. Then put them back. Hold for 5 to 8 breaths and switch sides.
For more balance work without a wall, have a look at our beginner’s guide to standing balance poses.
5. Wall Warrior III
Warrior III is hard. The wall makes it learnable.
- Stand facing away from the wall, about one leg’s length in front of it.
- Hinge forward from your hips and lift your right leg behind you until your foot touches the wall at hip height.
- Press your sole into the wall. Your standing leg and your lifted leg now work against each other, which steadies you.
- Keep both hip points facing the floor. Your lifted toes point down, not out to the side.
- Rest your hands on your hips or on blocks under your shoulders. Hold for 5 breaths and switch sides.
If your foot slides down, scoot a little closer to the wall.
6. Wall Chest Opener
For anyone hunched over a laptop all day. So, most of us.
- Stand side-on to the wall, right side closest.
- Place your right palm on the wall slightly behind you, at shoulder height, arm straight but not locked.
- Slowly turn your chest and feet away from the wall until you feel a stretch across the front of your shoulder and chest.
- Keep your shoulder down, away from your ear. Breathe into the stretch for 5 to 8 breaths.
- Switch sides.
You want a stretch, not a pinch or tingling down the arm. If you feel either, back off.
7. Wall Figure Four
A friendlier version of pigeon pose. Great for tight hips.
- Lie on your back with your hips a few feet from the wall and your feet flat against it, knees bent at roughly 90 degrees.
- Cross your right ankle over your left thigh, just above the knee. Flex your right foot.
- For more stretch, scoot your hips closer to the wall. For less, scoot away.
- Let your right knee drift gently away from you. Keep your lower back resting on the mat.
- Stay for 8 to 10 breaths and switch sides.
8. Half Handstand Prep (L-Shape)
This one comes with a warning label. It’s a real inversion.
Skip this one if you have wrist, shoulder or neck injuries, high blood pressure, glaucoma or any eye condition, a heart condition, or you’re pregnant. Also skip it if you can’t yet hold a steady wall down dog or a plank for a few breaths. There’s no rush.
- Sit on the mat with your back against the wall and your legs straight out. Mark where your heels land. That’s where your hands go.
- Turn around and come onto hands and knees with your wrists at that mark, fingers spread, facing away from the wall.
- Lift into a downward dog with your heels against the wall.
- Walk one foot up the wall to hip height, then the other. Your body should make an L, with hips stacked over shoulders and legs parallel to the floor.
- Press the floor away and keep your head between your arms. Hold for 3 to 5 breaths at most.
- Walk your feet down one at a time and rest in child’s pose.
If any part feels sketchy, stop at step 3. Wall down dog is a perfectly good pose. For a gentler path into being upside down, see our beginner inversions guide.
A 15-Minute Wall Yoga Sequence
This flow uses everything above except the handstand prep. Add that once you feel ready.
| Pose | Time |
|---|---|
| Wall downward dog | 1 minute |
| Wall chest opener | 1 minute per side |
| Wall chair pose | 3 rounds of 5 breaths, about 2 minutes |
| Wall tree pose | 1 minute per side |
| Wall warrior III | 1 minute per side |
| Wall figure four | 1 minute per side |
| Legs up the wall | 4 minutes |
That’s about 15 minutes. If you only have 5, just do legs up the wall. Honestly, that alone is a nice way to end a long day.
If you like the restful end of this, our list of restorative yoga poses pairs well with it.
Common Mistakes
A few things I see a lot.
- Leaning on the wall instead of using it. In tree and warrior III the wall is a guide, not a crutch. Light fingertips, not your full body weight.
- Standing too close or too far. If something feels off, adjust your feet before you push harder.
- Forcing legs up the wall. If your lower back peels off the mat, scoot back.
- Holding your breath. Especially in chair pose. If you can’t breathe slowly, ease out a little.
- Rushing the inversion. The L-shape needs a warm body and strong shoulders. Skipping the prep just makes you nervous.
Frequently Asked Questions
- Is wall yoga good for beginners?
- Yes. The wall gives you support for balance and feedback on alignment, so you can learn a pose's shape without fighting to stay upright. Over time you can rely on it less.
- How long should I stay in legs up the wall?
- 3 to 5 minutes is a good range for most people. If your feet start to tingle or go numb, bend your knees and bring your feet down for a while. Check with your doctor first if you have glaucoma, high blood pressure or a heart condition.
- What's the difference between wall yoga and wall Pilates?
- Wall Pilates usually focuses on core strength and controlled repetitions. Wall yoga uses the wall to support yoga poses, balance work, gentle inversions and restorative holds. Both fit happily in the same routine.
- How often should I do wall yoga?
- A few times a week is plenty to start. The 15-minute sequence is short enough for most days. Consistency matters more than session length.
Where to Start
Pick one pose. Legs up the wall is the easiest win, and wall chair is the quickest way to feel like you did something. Do it a few times this week. Then try the 15-minute sequence. The wall isn’t going anywhere.
More guides
All Yoga Poses Yoga Poses
Yoga for Menopause: 8 Poses and a Cooling Breath That Help
Yoga for menopause won't balance your hormones, and anyone who tells you it will is selling something. What it can do is help you sleep a bit better, keep your joints moving, build some strength and balance, and give you a calm way to ride out a hot flash. Below is a short practice with …
 Yoga Poses
Yoga Blankets: The Versatile Prop for Comfort and Support
The humble yoga blanket might seem like a simple accessory, but it's one of the most versatile and valuable props you can add to your practice. Whether you're a beginner looking for extra support or an advanced practitioner seeking to deepen your poses, a yoga blanket can be your trusted companion on the mat. In …
 Yoga Poses
Yoga Mudras for Mental Clarity: Boost Focus and Cognitive Function
In our fast-paced world, maintaining mental clarity and focus can feel like an increasingly challenging task. While many turn to modern solutions, ancient yogic wisdom offers a powerful yet simple approach through the practice of mudras - sacred hand gestures that can significantly impact our cognitive function and mental acuity. Mudras work by creating specific …